Friday, December 31, 2010

Introducing Antipasto Hardware Wiki

Over the past two months, Chris, Will, Nick, and I have stealthily upgraded and migrated all of the Liquidware wiki content over to a new wiki... the Antipasto Hardware Wiki.

I decided it was finally time to upgrade the wiki to a higher end system, and using pbwiki seemed like a pretty decent choice. It'll still take some time to finish the migration, but until then, the benefits are quite nice - the new wiki has a lot more features than the original Liquidware Wiki (which technically was an upgrade from the formerly-original wiki, over at the www.liquidware.org site, which doesn't even exist any more).

Not a big deal, but thanks for all the help - and hopefully this will help address all those emails about folks wanting more help finding reference specs and documents for Liquidware hardware.


Cheers!

Wednesday, December 29, 2010

Writing Hello World on the Android with Eclipse

I've gotten several dozen (!) emails in the past few days from DIY'ers, engineers, hackers, etc. asking for a very simple tutorial - a "hello world android" if you will. It then occurred to me that most of these emails are from people that just got an Android kit for Christmas (thanks to all the help from Matt and Will and Mike to get everything out the door in time).

So here goes. These instructions are summarized over at the wiki on this page.

Step 1: Install Eclipse
Download Eclipse Galileo-SR2 for Mac OS X-32bit  or Windows-32bit or Linux-Ubuntu-32bit, and install it to the desktop or some location inside Documents.

Step 2: Install the Android SDK
This is the trickiest step... Download Android SDK Tools for Mac OS X-32bit or Windows-32bit or Linux-Ubuntu-32bit, and extract the archive into the /eclipse/plugins folder. Open Eclipse, select Help > Install New Software... Click Add, in the top-right corner.When the Add Repository dialog that appears, enter the following:
  1. Name: ADT Plugin 
  2. Location: https://dl-ssl.google.com/android/eclipse/ 
  3. Note: If you have trouble acquiring the plugin, try using "http" in the Location URL, instead of "https" (https is preferred for security reasons).

Click OK and then in the Available Software dialog, select the checkbox next to Developer Tools. Click Next. Then click through to the end until you're done, and then shut down and restart Eclipse.

Then, click the Eclipse -> Preferences Menu, click the Android category, and browse for SDK location: /eclipse/plugins/android-sdk-2.1_r1. Click OK to apply, and the Target, Vendor, Platform, and API columns should have values, then click OK again.

Step 3: Configure ADB
If you're running on Mac, you're already done. If you 're running on Windows, you have to do a couple extra steps. First, download the SDK from Liquidware - this one is specifically designed to work with the Android DIY Starter Kit and the Android Hardware Development Kit. To install the USB driver, just plug a mini-USB cable into the BeagleBoards USB OTG port, and manually install the driver from your_sdk_path/google-usb_driver into rowboat gadget.
Step 4: Create an Android App
Select File->New Project, and click Android->Android Project. You have options at this point - you can "Create a new project in workspace" and call it whatever you want. This will make a "hello world" template application. Or! You can select "Create project from existing source", and select SkeletonApp. I recommend you do this, and select SkeletonApp. If that doesn't work, then try to default app.
 
Now, plug in Android, select the main source file (in the left panel, under src -> com.example.android.skeletonapp -> SkeletonActivity.java) and press the Go button (the Green arrow on the top line of the menu bar), and you're ready to go.


Step 5: Customize
The most obvious thing to do is change the "Hello World" text. That's probably the safest way to go to start, just to make sure things are compiling properly. I've changed it to "Hello, inthebitz!" and voila - here it is, functionally working on the Android Embedded Hardware Development Kit:
Turns into this:

Bingo! Dino DNA!

Monday, December 27, 2010

Android vs. the Embedded Programmer Mindset

Eclipse Apps Roasting on an Open Android
ADB nipping at your serial bus.
Yuletide GUIs being compiled through XML,
And freakin' complicated data reference schemes that make you call even a single string from an outside standalone strings.xml file by @string/hello or R.string.hello.


Everybody knows a compiler and some global vars,
Help to make coding simple and fast.
Local functions with their scopes all aglo(bal).
Will find it much easier than dereferencing every gosh-darn string text variable.

What the helloworld, Google! Whatever happened to:

char gButtonText[] = "Option On";

function mytoggle( void) {
  strcpy(gButtonText,"Option Off")
}

Sure, it's ugly code. There's a better way to do it. But it's fast, easy, and simple, and intuitive to the C programmer's mindset. Welcome to the wonderful world of Java-inspired coding on Android. Everything is an object, and needs it's own varspace. Programming Android is like programming in Ruby on Rails' MVC stack. You aren't really writing a standalone app, you're just given the honor - and privilege if I say so - to glue on some function code on top of an existing framework. Programming Android is like programming Java - instead of thinking about building the app from the ground up, you're essentially writing a "diff" file on top of a massive mountain of existing code and functionality. The baseline app already does a bunch of stuff perfectly fine, thank you.

It's as if Android is constantly saying to me, "Oh, what, you want it to do something different? Overload my already perfectly-written function, why don't you. Pffft. I already thought of that. I have a better idea: why don't you *not* write your function, and instead use one of mine, and decrease the surplus population of crappy code!"

Bah humbugtracking
Programming in Android, like Java, I am constantly reminding of how little I know, because someone's already thought of that function, and it already exists - I just have to inherit and object and parent a class, @override a base class, and unprotect a final public method.

Want to make a toggle button change it's text? Duh:

android:textOff="Option Off"
android:textOn="Option On"

Herein lie the central difference in mindset between the Embedded Programmer and the Android Programmer:

Embedded (Arduino) Programming Mindset
In embedded land, we are trained to start from void main(void) and #include math.h and work upwards. From function control, application execution, to variable space definition, everything trains you to think about in a device-first mentality. You're thinking to yourself, "I have a device with XX megs of RAM, a YY MHz CPU, and a ZZ pixel screen." Optimization is the name of the game, efficiency matters, and resources are at a premium so it's worth taking the time to think them through.

Stretching the metaphor a bit for a minute, embedded coding is like heliocentrism - with the device at the center of the world:


Android Programming Mindset
In Android land, you are trained to start from a base, and extend some Activity class. You're writing diff code, pulling objects and their nested functions only when you need them. You are really writing *code*, you're just pulling and gluing together bits and pieces of functionality that were already written for you. The device doesn't matter, and why should it, because you're writing an app that might run on a tablet or a hand-held or an on-screen emulator. God only knows how many megs of RAM, CPU MHz, and pixels you'll have, so you'd better write your code abstractly and cross your fingers that it runs. Everything trains you to think about a user-first mentality.

All things considered, this isn't easy for an embedded programmer to embrace. Dare I say embracing and learning Android coding is the equivalent to the Copernican Revolution:


Device-first vs. User-first
Embedded programmers are more likely to build a new hardware device layer to push the performance envelope of a given piece of hardware. Android programmers are more likely to deliver a fantastic user experience that connects web-to-handheld-to-sensors first and foremost, and who cares if it sits and hangs for a few seconds while it calculates? The user will be stunned by the drop-shadowed jelly buttons, he won't even mind :-)

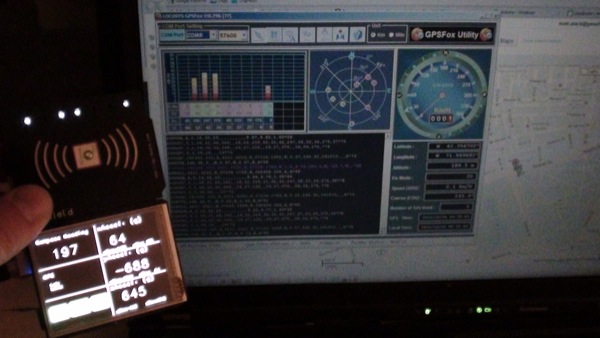
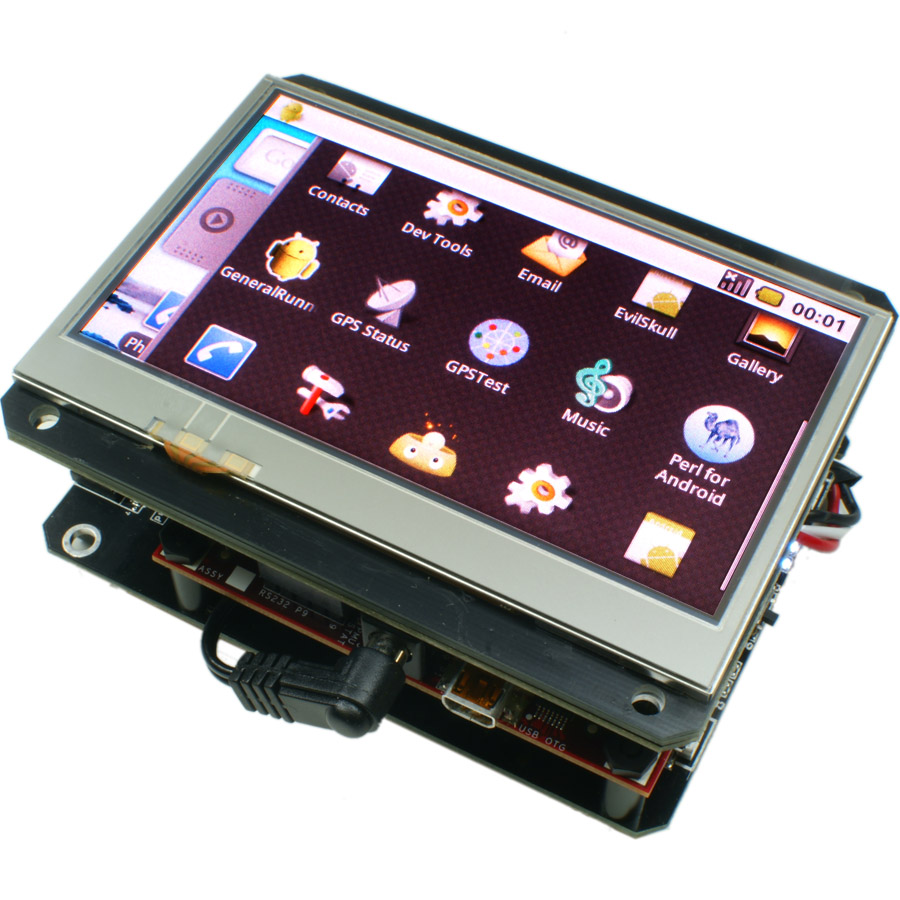
And the truth is... after several weeks of hacking my Android DIY Starter Kit, I don't mind either. I've found myself converting to a new religion, in the name of developing super-sleek looking GUI's in no time at all, it's really something. Doing the same in Linux would take weeks, maybe months (but that's another discussion for another time). Take my "void main( void)" from me, and give me my "public class extends Activity" any day of the week! But there are some downsides.

One major downside is the need for massively large reference manuals, or the need to constantly be connected to the web, for documentation, specs, and references. Try coding a rails webapp without access to the internet - impossible. On the other hand, all you need to code Arduino is a little cheatsheet - since you're essentially building everything up from scratch out of C primitive functions, all you need is the list of those functions. So what if you re-invent the wheel a few times? On Android, like Rails, you constantly need to know the top-down bigger picture. You need to have in your frame of mind the major high-level code objects, which you then reference down with the . dot-operator until you get to the method/function you were looking for. This means needing large amounts of documentation, and examples that are typically on the web.

Not better, not worse, mostly just different.

Saturday, December 25, 2010

Have Yourself a Merry Little Android ADB Rootkit

Quite a few people have emailed me about the post "The End of The Open Source Hardware Cambrian Age", and Chris had a few interesting observations and dialog about it on the Amp Hour - thanks (also a great set of casts in general)! Thank you... consider this the first installment of hackery to come :-)

It's one thing to have an Android. It's fun to download apps and whatnot, but at some point, you want to actually change the functionality of something, or make your own. That's the situation I found myself in recently, and so I've been hacking quite a bit on the Android DIY Starter Kit that I carry around.
 

The first thing anyone does when they get the Starter Kit or the Android Hardware Development Kit (more aimed at embedded programmers and engineers looking to learn Android) is... rootkit it, of course! I can honestly say that every device I have ever owned, I test on the basis of how quickly I can root it.
Now I just plug in the USB B mini cable into the side of the BeagleBoard. There's a USB B mini port on the BeagleTouch too, but don't plug into that one, since that's the serial debug port for the BeagleTouch.
 Here's proof that it works, and it's powered on:
 Now, it's as simple as popping up the "adb" debugger. Although I've mostly been a Windows/Linux guy up until now, I've been convinced recently to try out a lot of my development on Mac. One of the reasons, is illustrated here - all I have to do after I install the "adb toolkit". ABD is the Google set of command line utilities that allow you to communicate with an Android device at the low level - effectively "rooting it". Here's a link that describes what adb can do.

 And that's it. This is a little windows showing the results of running:
./adb shell
ls
You can see the command line interface shows the root set of directories, including my personal favorite, "sdcard" which is a symlink to the sd card storage space on Liquidware Android port. Another fun thing to do is to plug in the Android DIY Starter Kit, plug in the usb cable to the Mac, reboot, and type:
./adb shell
logcat
"Logcat" is the debugging interface, which shows all of the details of the boot-up process, for those that are hacker inclined. It's 100% pure fun - and especially helpful given you can also do things like:
./adb logcat | grep usb
From the Mac command line shell, running this command let's you see any startup debug messages associated with usb. Powerful, if I do say so myself.

Try that on an iPod or iPad :-)

Tuesday, December 21, 2010

The End of The Open Source Hardware Cambrian Age


This is the first time in almost 3 weeks I'm evenly lifting my head up to breath, after the massive chaos of Black Friday. Now, on to the fun stuff... my project back log, which I've been dying to blog about :-) But first, I spent some time browsing around the web at some recent OSHW projects, and I had a few thoughts I wanted to share...

Two years ago, Justin and I made a prediction… that the recent round of Open Source hardware was a re-invention of the same phenomenon that happened about 15-20 years ago, with the creation of DIY homebrew electronic computers. The recent round of open source hardware seemed to have been triggered by the advent of the ever-popular microcontroller, the Arduino.

Along with this trend came the replacement of the old guard, the Basic STAMP, with the new guard, the Arduino. For the past two and a half years, it’s been chaotic, emergent, collective, and exciting. The modularity introduced by the simple decision to fix the headers on the Arduino led to an explosion in the number of “shields” that fit those pins (including that ridiculous but essential, non-standard “gap” along the digital IO side which prevents someone from accidentally inserting a shield backwards). Arduino drove a reinvention of Open Source Hardware, from an artistic perspective, and allowed projects and hacking to occur faster than ever before...

Open Source Hardware >= Arduino!

But “open source hardware” is not synonymous with “Arduino” … it stands for much more than a "breakout board" for an Atmel chip. It represents the lowering of transaction costs, cheaper hacking, faster physical computing prototyping. It’s much more. But I've noticed an increasingly disturbing trend: companies are moving in for the kill. Noticing the success of the recent Open Source Hardware movement led by Arduino, the "old guard" is striking back - but they're striking back with the same out-dated tools that made them irrelevant on the web over the past few years... proprietary tool-chains, Windows-only custom IDE's, serial debugging interfaces (not USB), and special ROM flashing hardware.

Are you kidding me? This is a complete reversion back to the horrible life we all knew hardware to be 5 years ago, before Arduino came along. I will argue a strong point: Embedded Companies Just Don't Get It(TM). ECJDGI(TM)? They don't understand the web, they don't understand what Arduino is, why it succeeded, where it is headed. They just look at Arduino, and say, "I wish that was my silicon chip on there, and not Atmel's" and *POOF* they cram out yet another crappy dev board that no one is ever going to build anything with. Shame on them. The world doesn't need more Arduino clones. I think it needs more kick-ass projects.

So I would argue that two and half years ago, we saw the Cambrian Explosion of Open Source Hardware. New shields came out regularly, expanding the Arduino platform and the system. They were sloppy, inefficient, unoptimized, and *that was the point*. That inefficiency was good - it promoted hacking, and tinkering. It forced you to NOT follow directions. And yet the entire time, the Arduino remained a bedrock platform, and projects spawned and reproduced, remixed, recombined. All was open, collaborative, and expressive.


But to what end?

The Cambrian Explosion of biological diversity came to an end (eventually - thank goodness) as the Paleozoic Era marched onward. And when it did, life forms evolved - some of them were smaller, simpler, and potentially (arguably) less diverse and more optimized in their use of energy (metabolic optimization, anyone?). Others, meanwhile, grew larger and more complex, monstrous if you will.

Is the same thing happening to Open Source Hardware?

Have we left the era of massive experimentation and entered an era of consolidation? I think so… unfortunately. I say unfortunately, because every growth spurt must steady and end, and with that end comes reduced inventiveness, less innovation, and … optimization and efficiency. Shields continue to be made, and built, and as DIY'ers venture into the world of running businesses (like my friends Limor at Adafruit and Nate at Sparkfun), they are stumbling into the dreaded theories of economics that have haunted 1000's of hardware companies before them: cost optimization. You can see this right now in the Arduino world ... instead of DIY'ers building crazy new shields that do new things, the "old guard" and "cost cutters" are moving in to mass produce the shields they think are the most profitable.

Don't get me wrong, cheaper and cheaper shields available to more people - that's FANTASTIC news! It means that the Open Source Hardware market is maturing - early innovation is being replaced with volume, efficiency, mainstream acceptance. We WON!!!


Out with the New, In with the Old

The Old Guard of embedded companies is back, and they're here to stay, displacing the temporary uber-innovative dystopian imbalance created for a brief period of time by the rowdy bands of individual DIY'ers. Open Source Hardware has reached it's full modern cycle, albeit faster than it did last time. Embedded companies, Chinese board houses, off-shore CAD designers, the industry is now in full bloom. Three years ago, I posted my first Arduino blog article - "Arduino, here I come!". I can barely believe it. The world has changed dramatically since that first article. Once a lonely, rogue band of hackers who once met in art space in the meat-packing district in NYC, the Open Source Hardware community now has a Summit, a massive annual Fair, and hundreds of suppliers and vendors!

But not everyone likes the "marketization" and "re-industrialization" of Open Source Hardware. Although costs of shields are plummeting, and a good dev board can be had for $5-10 dollars (!), not everyone is motivated just by low cost boards. Sure, many people are, but that's not the point. Just because you can get a 99 cent whopper doesn't mean you suddenly hate the taste of a char-broiled $10.50 Angus Beef burger.

Some people are motivated by kick-ass hacks, not mainstream projects.
Some people are motivated by ridiculousness, not rationality.
Some people like aesthetic design and balance, not just raw functionality.
Some people are driven by the thrill of the challenge, not just the systematization of the status quo.
Some people HATE rules and order.

Like me.

Bring on the Char Broiled Angus Beef Burgers!


Maybe I'm just hungry, but I’m going down with a fight. I don’t accept the end of Open Source Hardware innovation as the 99 cent whopper dev board. If the whole vision of OSHW just turns out to have created another excuse for a bunch of lowsy Windows-only dev boards with proprietary toolchains, horrible tech support hotlines, and mysterious libraries that have no documentation, I will be very sad.

I insist on fighting back, and making something new and different, and weird, strange, and unpredictable. That’s what makes Open Source Hardware fun and challenging to me. In fact, I think the fight itself is what it's about: constant reinvention, and pushing boundaries.

Now that that's out in the open, it's time to get back to doing what I enjoy most... hacking.

And that's what I'm all about.

Monday, November 29, 2010

Android^D^D^D^D^D^D^DCyber Monday

I've heard a lot about this magical "Cyber Monday" effect, and never really believed it until today. I've sold almost as much Android hardware in the past 3 days - including today - than I have in the previous MONTH. And the day isn't even over... I can't figure out where all the traffic is coming from...

It's like the Slashdot Effect met the Digg and Reddit Effect, and got in a three-way love triangle. And then the bastard child grew up and wanted to program Android. I guess on the one hand, I'm happy that a lot of people like the kits I'm building, and on the other hand I'm thinking to myself,... I have a lot of work to do.

It's only 2 pm, and for the first time in a long time, I'm low on almost all of the inventory and products I stock at Liquidware... but especially on the Android hardware development kits. For those that don't know, this is a big deal because all of the kits are hand made, hand soldered, and hand packaged by Will, Chris, Matt and me. I usually like to keep enough kits built up so I can hack on a few of them myself, but today, I'm so low that I've had to cancel most of my plans for the next week so I can catch up (sorry Nick!)...

The next 10-14 days are going to be ridiculous, but I will do the best I can to ensure that I don't go out of stock on anything for too long. Here's my plan:

-I'm going to spend all day soldering and building
-I'm going to spend all night programming
-I'm going to spend all "meta-night" packaging


"Meta-night" is my name for that time of the night when you really ought to be asleep, but aren't, because the program isn't compiling for some reason, and you really want to get it done before the next day. Also known as 1 am - 5 am.

I guess all I can say is, thanks for supporting Liquidware, and for supporting Open Source, the Open Source Hardware movement, hardware hacking, Arduino, and Android.

Now it's my turn to work my ass off to make sure everything gets out in time!

Saturday, November 13, 2010

Tron on Android Gadget Pack

Reliving my childhood/young adulthood for just one minute, the only movie that even held a candle to Sneakers and Hackers was Tron. Fantasies of flying through the motherboard in search of missing ROM addresses and hexdumping around with light racing motorcycles is pretty much what gets me by some late nights while hacking. It sure romanticized the reality of actual programming experience, which typically consisted of gcc-make-vi-pico-repeat-success-segfault.

So when I found out that the new Tron movie was coming out, and that it had motorcycles, and modern interpretations of the flying-saucers-of-death meets-American-Gladiator game, I got excited. In fact, I think all the guys and I at Liquidware are going to take a full half day off just to see the movie together (ps if you're in the Boston/Cambridge area, and want to come along, just shoot me an email at inthebitz at gmail).
Anyway, I'm anxious. I think the movie is going to rock. And even if it doesn't, I'm going to see it anyway because of how influential it was to me, and many guys I know.

And in honor of that great movie, Will and Chris and I found an interpretation of Tron, called "Light Racer 3D", and got it running on the Liquidware Android Gadget Pack, running Android on the Beagleboard... enjoy!
Here's a video of it running on the Android-Beagleboard-BeagleTouch combination. It's surprisingly fast and snappy for a portable device like this - at first, I couldn't really believe that the 3D graphics were so fluid...

All of the modules and components are available at the liquidware shop, and some more pictures are up on the Flickr page. Enjoy!

Friday, November 12, 2010

Simultaneous Quad Charging Lithium Batteries

In the past week, I've gotten a number of emails from people asking about the BeagleJuice module, and how you charge it. The BeagleJuice is a lithium ion rechargeable battery that snaps to the back of a Beagleboard, and let's you power it and any circuits or other modules like the BeagleTouch that you might have snapped on top of it for 4-6 hours depending on how much drain. If it's just the Beagleboard, it's about 6.5 hours.

Well, this is how *I* charge it - I typically charge 3-4 of them at once, running off of a USB "charging station", which is really just a 4-port USB hub that I've gutted, and wired up. The power is enough from this one USB hub to power 4 BeagleJuice's at a time.
Here's a video showing off my personal setup:

Wednesday, November 10, 2010

Arduino Uno launched and connected to the TouchShield Slide

Hallelujah! Finally, an Arduino edition with a sufficiently Anglicized name that I can actually pronounce!

Introducing the Arduino Uno. Uno. Pronounced: "ooo-no"

Not "doooehmillahnoevuh" like the previous version of the Arduino. Just Arduino Uno. Arduino Uno. It's as if a million teachers, educators, students, hackers, and DIY'ers cried out out in unison, and were NOT silenced by the second syllable after tripping over their tongues!

Here's my first Arduino Uno, still sitting inside its box, with no idea what kind of heinous, mind-stretching, solder-busting torture it's about to go through in the coming months. If it only knew... it might stay inside it's little comfort box:

This is my first one, taken out of the box:
Here it is, sitting next to my trusty sidekick, the Illuminato Genesis. The Illuminato Genesis is still my go-to-board for high numbers of I/O requirements, and for a slightly faster speed:
Of course my first reaction was,... does it work with the TouchShield Slide? The answer was... yes, it most certainly does:
Justin just threw the Arduino Uno up over on the Liquidware Shop... and I uploaded some pictures over at the Flickr page. I'll be using the Arduino Uno in my upcoming projects, and will start seeing if there are any particular anomalies with my code samples, although I expect there not to be.

PS I like the new logo and color art too, nicely done, Team Arduino!

Tuesday, November 9, 2010

Skin Skeleton Guts (SSG) turns a TouchShield and Arduino into a Tricorder

I met Dominic Muren at the OSHW Summit in NYC. To say he's a pretty smart guy is a dramatic understatement - he's ridiculously creative, plus he has a contagious energy! So I spent some time digging around, and a few emails later, I dug up his TED talk - which to me pretty much hits the nail on the head.

"Modular, Hackable, and Open components that could be reconfigured into a variety of components."

YES YES YES!!! (I think I just had a When Harry Met Sally moment for OSHW modularity...)
Dominic has this idea that skin-skeleton-guts can server as a powerful metaphor for connecting all of the pieces together of modular devices. I've been thinking about this for a while, but Dominic's ideas really push it further than I had thought. The "last mile" of modular gadgets so to speak is the enclosure, the case, and the "wrapping" around modular gadgets.

The problem is that while modularity is clearly the future of gadgetry, no one up until now has really found a satisfying solution to the problem of high-cost enclosure design. Enclosures are hard to build, and require long iterations of designs. Until 3D printing is really on everyone's desktop, the idea of fabricating an enclosure for Open Source Hardware and Electronics is an expensive idea. But moreso than that, even if 3D printing on the desktop were a reality, you'd likely want to minimize the amount of material you use in a custom enclosure.

To the idea of "Skin Skeleton Guts" or SSG by Dominic, is that we should build the skeletal components that hug the sides of modular electronics, and then build wrappers out of flexible fabric, e.g. "skin" to wrap around the skeleton. The modules - for instance, the Arduino modules in this case, serve as the "guts". The fragmented structural hugging pieces serve as the "skeleton", and the flexible, perhaps transparent, fabric material becomes the skin.

The result is... drum roll...

Pretty...

...darn...
...cool.

That's Dominic applying the principles of SSG to the MegaPalm Gadget Kit... stepwise heading in the direction of making it into a full blown device. That just made my entire week, seeing the concept of modularity and reconfigurable gadget components, getting pushed to the next level. It's one of those concepts that seems so straight-forward and natural, it makes me think, "why didn't I think of that?"

I'll have what he's having!

Monday, November 8, 2010

A Beginner's Tutorial to Programming Android on the Beagleboard

Android is a fun development system platform - but you have to really enjoy googling around for relatively funky command line arguments if you're planning on making any progress in the course of one night. The google guys knew what they were doing, or at least did a great job building something pretty cool that works. Chris and I have been spending a decent amount of time learning how to program Android, and so I figured I'd write up a brief tutorial for anyone out there that doesn't want to spend nearly as much time as it took us to figure it out.
The first step in programming Android is to download the Android SDK: http://developer.android.com/sdk/index.html


On Ubuntu Linux, I downloaded the SDK into the home directory, and unzipped / untarred it. The next step is to get the Beagle Android Gadget Pack recognizing on the USB port. The next step involves plugging a USB cable into the side of the gadget. Once it's in, run the command:

lsusb

I get a bunch of Bus 001 through Bus 005, followed by Device blablabla information. Here's the trick. You want to find the ID of the Android device, so run lsusb while the device is unplugged, and then run it again. On my computer, the line that changes when the Android gadget is plugged in is:


Bus 001 Device 004: ID 18d1:9018


Ok. Now create a file called "51-android.rules". See the part in the line above that says, "18d1"? and "Device 004"? That's idVendor and idProduct respectively. So change those values in the file content below:

SUBSYSTEMS=="usb"
ATTRS{idVendor}=="18d1",
ATTRS{idProduct}=="0004",
MODE="0666"

Then copy the file here:

/etc/udev/rules.d/51-android.rules

This is a rather convoluted and manual way to get the Ubuntu Linux OS recognizing the Android Gadget as a native Android device. Now, you can cd into the SDK directory, and type:

./adb devices

And the device should show up. This is what I get:

List of devices attached:
20100720 device
Now I can use this command to get access to the Android Shell:

./adb shell


You'll get kicked out directly to the Android root command line, where you'll notice you can use ls, cd, cp, mv, rm, and cat. And that's about it. No text editor, no vi, no nothing. Pretty limited. Likely, you'll want to copy files on and off of the Android gadget, so you'll typically use these commands that come along with the Android SDK: 
./adb push your_file to_location_on_android 
./adb pull path_to_file_on_android 
./adb --help
And most importantly... if you have an APK downloaded or compiled for Android, and you want to install it, just use:

./adb install blabla.apk

Voila!


Tuesday, October 26, 2010

Using the GeoShield to build an Open Source Hardware GPS

I've been trying to get a GPS sensor working with my Arduino for a long time. And without fail, they just don't work. Don't get me wrong - the ones that other people have made work, but they're spotty, and you have to be in the right corner, the right place at the right time. And if a leaf flitters off a tree at just the right time, the dew moisture creates enough interference that the signal's lost. And just when the signal comes back, it fails again just as quickly and then I barely get enough data points to recreate anything interesting.


Not any more >:-)


There may be cheaper GPS shields out there, but that's not the point. The point of the GeoShield is that it works, and it's competitive with commercial off-the-shelf GPS's. Out of the box. No coding, no digging around, it just works. And if you combine it and a TouchShield Slide, you have a completely portable DIY GPS... that is as powerful as most of the mainstream GPS's out there you can buy off the shelf.
This is the only GPS shield I've been able to test reliably in cities, from cars, and inside cases. So the steps to create an Arduino GPS with the GeoShield are pretty straight forward. You'll need:
The Lithium BackPack goes in back of the DoubleWide ExtenderShield next to the Arduino, and the TouchShield Slide and the GeoShield go on top. Like this:


Here's a side angle:
And here's a funky perspective shot:
As you can see from the pictures, the GeoShield has a GPS sensor smack dab in the middle of the shield, with retro wireless solder pads emanating from it, as if to replicate a 1940's moving picture radio tower. On top of the GeoShield are a line of 4 user-controllable I/O pins (for debugging, of course), and then a GPS Rx and Tx pin, and finally a power white LED that tells you when it's powered up and has a signal. It's specifically designed this way because of all my hours of frustration with other GPS shields, wondering, "Does this thing ever work? Is it even powered on?" So this shield is designed to eliminate variables quickly, and get you up and running as quickly as possible. Oh yeah, and it also has a built in 3-axis accelerometer and compass, so it deserves it's name, "GeoShield".


Here's a link to the Open Source App Store app code that shows off a simple Night Rider program, plus polling of the GPS, Compass and 3-axis Accelerometer. The heart of the code is built into the Antipasto Arduino IDE function set:

void loop() {

   gps_msg = geo.readGPS();
  
   /* Print the GPS data */
   Serial.print(gps_msg);
  
   /* Parse GPS data and send to the PC */
   //for (int i=0; i< strlen(gps_msg); i++) {
   //  handleGPS(gps_msg[i]);
   //}

   /* Print the Compass heading, Accel X, Accel Y, Accel Z data */
   sprintf(out, "$GEO,H%d,X%d,Y%d,Z%d\n", comp, x, y, z);  
comp = geo.readCompass();
x = geo.readAccelX();
y = geo.readAccelY();
z = geo.readAccelZ();

//   delay(100);
   Serial.print(out);
  
   Sensor.print("co", comp);
   Sensor.print("xa", x);
   Sensor.print("ya", y);
   Sensor.print("za", z);
}


Here's a video showing it off:

The coolest part is that if you load up the pass-through sketch onto the Arduino, you can uncomment the coupe of lines that say, "print out to the PC", and then you can plug it in, load up a program like GPSFox, and get this:
Voila! Proof that it works - even from inside a friend's apartment!


Justin just uploaded the GeoShield over onto the Liquidware Shop, here...

Monday, October 25, 2010

Up and running on the Android DIY Development Kit in 180 seconds

Android is a high performance open source hardware and software development system platform - but you have to really enjoy googling around for relatively funky command line arguments to get a device up and running for the first time. This post is meant to save anyone who's picking up Android for the first time some serious time... I really wanted to name this "in 60 seconds or less" but I timed myself, and I'm being realistic - it takes about 3 minutes. 


The google guys knew what they were doing, or at least did a great job building something pretty cool that works. Chris and I have been spending a decent amount of time learning how to program Android, and so I figured I'd write up a brief tutorial for anyone out there that doesn't want to spend nearly as much time as it took us to figure it out.

The first step in programming Android is to download the Android SDK

On Ubuntu Linux, I downloaded the SDK into the home directory, and unzipped / untarred it. The next step is to get the Android DIY Starter Kit or the Hardware Development Kit recognizing on the USB port. The next step involves plugging a USB cable into the side of the gadget. Once it's in, run the command:
 

lsusb


I get a bunch of Bus 001 through Bus 005, followed by Device blablabla information. Here's the trick: you want to find the ID of the Android device, so run lsusb while the device is unplugged, and then run it again. On my computer, the line that changes when the Android gadget is plugged in is:

Bus 001 Device 004: ID 18d1:9018

Ok. Now create a file called "51-android.rules". See the part in the line above that says, "18d1"? and "Device 004"? That's idVendor and idProduct respectively. So change those values in the file content below:

SUBSYSTEMS=="usb"
ATTRS{idVendor}=="18d1",
ATTRS{idProduct}=="0004",
MODE="0666"

Then copy the file here:

/etc/udev/rules.d/51-android.rules

This is a rather convoluted and manual way to get the Ubuntu Linux OS recognizing the Android Gadget as a native Android device. Now, you can cd into the SDK directory, and type:

./adb devices

And the device should show up. This is what I get:

List of devices attached
20100720 device

Now I can use this command to get access to the Android Shell:

./adb shell

To copy files on and off of the Android gadget, use these commands:

./adb push
./adb pull
./adb --help

And most importantly... if you have an APK downloaded or compiled for Android, and you want to install it, just use:

./adb install blabla.apk

Voila!

Tuesday, October 19, 2010

Introducing the DIY Android Gadget Starter Kit

This past weekend, Chris and I hacked Android onto the Beagleboard Embedded Gadget Pack. It was the culmination of about 3 weeks worth of working straight through, sleeping very little, and consuming many ASCII bunsen burner Red Bull's :-) The result is the DIY Android Gadget Starter Kit, which includes everything anyone would want or need to get started programming Android hardware and software applications, and to make a custom Android device.

Here's a picture of the Android DIY kit assembled:
The DIY Android Modular Gadget development kit uses the same base modules as the Open SciCal, which got written up on Wired (thanks!), and also as the Embedded Beagleboard Gadget Pack, which has been really popular with embedded systems engineers:
 
This is a nice perspective shot of the Android home menu, where the apps are typically stored and can be launched. The settings menu and options are fully functional, and the system comes preloaded with SL4A, a high performance scripting language that lets programmers write GUI's in Perl or Python (and a handful of other scripting languages):
 
Justin uploaded all of the modules, components, and preprogrammed SD cards onto the Liquidware shop over here... and here.

Monday, October 18, 2010

Breaking Hardware Barriers: Linux vs. Android Gadgets

Here's a quick video showing off the DIY Android Modular Gadget I made with Chris:


Motivation
As it turns out, getting Android up and running on the Beagleboard is not too hard. Others have done it before. The hard part is doing it on a little modular gadget, that you can touch and type on the screen with natively, like any other Android gadget.

Ever since Google started controlling how many Android development kits are released, developers have had very few options for programming on Android. My goal was to make an Android Development Kit that significantly reduced the amount of time it normally takes to integrate custom hardware into the Android development.

Breaking barriers
Rapid prototyping with open source hardware isn't easy. It's certainly easier today than it was 5 or 10 years ago, and I like to think based on the emails and messages and calls I've gotten from friends and fellow developers, that projects like the Open SciCal and the Linux-based Beagleboard Embedded Starter Kit help.

In the last couple months, I've been hacking away on the Linux modular gadget platform, and for most applications, it's amazingly fast and sharp. The only time it's lacking a bit is when it comes to developing a quick and dirty GUI.

Linux vs. Android
Embedded systems development can take two very different forms. On the one hand, it can rely heavily on low level programming languages, and a native Linux cross-language, multi-compiler, shell-integrated environment. This is useful for building applications like scientific calculators, data loggers, industrial design and automation controllers. Basically, it's good for devices that don't need glitzy GUI's, but rather, need to do heavy duty analytical work.

On the other hand, sometimes embedded systems development is lighter on the analysis, and relies more heavily on sensor polling and on presenting real-time data readouts from sensors to a user. It might be a remote control, home automation gadget, LAN network diagnostic utility, etc. That's when Android shines, because it makes developing a clean GUI a piece of cake. I've been quite impressed as I've learned more and more about Android, over the past few weeks. As I've hacked away at the underlying codebase, I've learned quite a bit about how the developers of Android approached things, and I've been impressed.

The Best Tool for the Job
But that doesn't mean I'm leaving Linux behind... I now have 2 supertools: Linux for industrial and analytical work, and Android for more user-friendly, sensor-heavy apps.

I posted some more pictures up on the flickr page...

Android Hacked onto the BeagleBoard OSHW GadgetPack ... with avengance

The time is 3:27 am on the East Coast as I write this. It's Sunday, I have work tomorrow morning.


I'm happy to say... Android has now officially been cracked onto the Beagle GadgetPack. Chris and I just finished hacking it onto the BeagleBoard, with a fully-integrated touchscreen OLED screen, overlay, and interface at the driver level to the BeagleTouch.

It connects to the internet.
It loads webpages, it runs scripts.
It reads and interfaces to sensors.
The touchscreen supports drag, drag and drop, sliding, scrolling, and gesturing.
It can download and run native Android APK files off of Open APK app stores.
It even runs the SL4A rapid prototyping environment that is scriptable in Perl and Python.


This was no easy task. Nick, Will, Chris, Mike all helped here and there with driver help and ideas for how to compile around the early driver problems. Thanks to the TI guys (esp. Gerald!), and the Google Groups community too for their help... and for the guys at embinux.org for a good starting point reference. And of course some special help from Google themselves (names will remain anonymous because I'd hate to see someone lose their job for supporting a hacker like me)... who came in at the last minute to help me crack open the driver access level, which allowed me to make a user-space display driver to the BeagleTouch... FROM SCRATCH.


Now the most important part of all of this is the question I got from Jake, when I talked to him 3 weeks ago: why?


Because I'm sick of the iPad. Every time you go into Starbucks, you see someone digitally frolicking around on their apps, clickety clacking around with glee, pinching and spinning their fingers around a million times just to do what you used to be able to do with CNTRL-+ or CNTRL-- to zoom in and out just as quickly, all the while being wholly restricted and unable to compile any of their own apps natively, and god forbid trying to access the driver level.
The problem is simple: I am fundamentally against the entire principle and idea of the phrase, "there's an app for that(TM)." (Are you serious?!?! I have to put a "Trademark" on that?!?) I think that little phrase is endemic of everything that's going wrong with the hacker world today. It symbolizes the end of an era. It is the antithesis of open, and the optimum of control and limitation.

I don't want an app for that. I want a programming language and access to some low level OS function for that.

I'm fighting back, and this Android hack is the first step in the war. The problem with the philosophy of "there's an app for that" is that it's training the new up and coming programmers and would-be hackers and developers that if you want some hitherto unavailable functionality for your device, you should go onto a tightly controlled ecosystem of apps (iTunes app store), and pay money for a limited, controlled, censored, channel monitored, Apple-sanctioned little app that took WAY too long to write because the darn specs are undocumented.


No thank you. I want to help teach, train, and motivate a new breed of far more open sourced and efficient hardware hackers...


Apple is going to lose. Because hackers are going to use the platform that is the most extensible, most hackable, and most fun to use. Programming the iPod and iPad and app store-compatible apps is an exercise in painful, torturous sacrifice. You start out development thinking you want to build a simple little functioning app. Then you find out, function by function, that Apple has restricted that functionality to a mere fragment of it's former self. Useless!


Android is where it's at. You get driver control if you need it, you have a multitude of programming languages, an Open Source app distribution channel, and raw sensor channels for interfacing with all kinds of sensors (stay tuned for some hacks on this to come). Android is literally the perfect rapid prototyping platform. It is just high level enough to be efficient, it's just low level enough to enable embedded applications development. And it's Open Source, so if you need to, you can just recompile the whole darn thing from scratch yourself if you want to.
And that's powerful. In the coming weeks, I'm going to do my best to integrate open source hardware and open source software together, using this newly cracked Android Gadget as my platform... bring it on!