Wednesday, June 23, 2010

Two Open Source Worlds Collide: Using Arduino Sensors with the BeagleBoard

Some of the comments from the Wired and Gizmodo articles were from folks asking what they could possibly do with open source hardware that they couldn't do with something finished, like an iPad.

I've never been one to compare myself to Apple, mostly because they make it hard to hack. But being able to hack the hardware means a lot of things. Most of the time I need the hardware to do something pretty specific that no handheld computer really comes with, like sensors.

It could really be any sensor, because as long as I had input/output pins I could tap into, I could modify the hardware to do all sorts of things. Since I had a bunch of sensors I had already been using with the Arduino, something simple I could do would be to take my sensor setup, and integrate into the BeagleBoard computer.

The part I really liked is that I could swap out whatever sensors I wanted, and still have it talk to my BeagleBoard computer. Of course, I also got a kick out of being able two use both of my favorite open source hardware platforms at the same time…

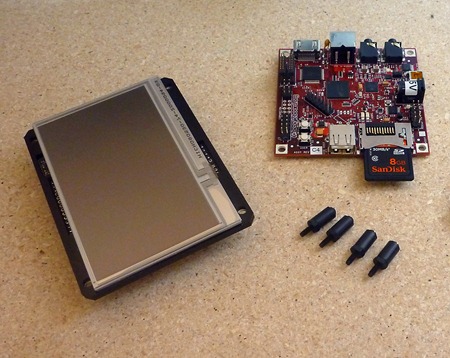
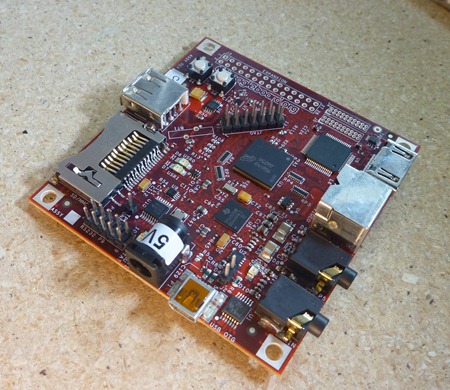
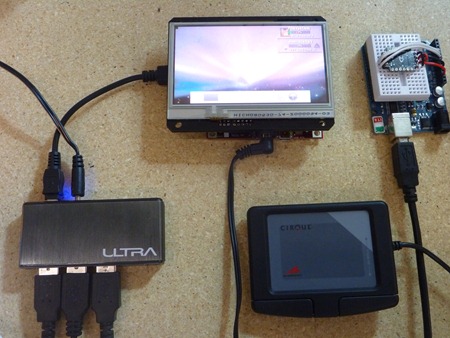
For this project, I used an Arduino Duemilanove, a 3-axis accelerometer, BeagleBoard C4 and a BeagleTouch. When connecting anything to the BeagleBoard via USB, a 4-port USB hub is useful too.
P1010076
Setting up the Arduino + Sensors + BeagleBoard on the BeagleTouch was actually pretty straightforward. The Arduino and Sensors can start outputting data with just a few lines of code found on a PDF cheatsheet, in this case for the accelerometer. Then, I got a couple drivers onto the BeagleBoard, and plugged the Arduino into the BeagleBoard over USB, and voila :-)

When connecting the BeagleBoard to the Arduino for the first time, I needed to install some USB drivers.

Step 1 (on Desktop): Download USB Serial and FTDI Linux packages

Before the Arduino could talk to the BeagleBoard, as with many computers, the BeagleBoard needed to have the right FTDI and USB serial drivers. I’ve uploaded them to the Liquidware server here:

usbserial.ipk
ftdi.ipk

Step 2: Copy these files to an BeagleBoard  boot SD card

To put these on the BeagleBoard, I copied the USB Serial and FTDI packages to my BeagleBoard boot SD card (root directory).

Step 3 (on BeagleBoard): Plug SD card into BeagleBoard and BeagleTouch, and power on

P1010075

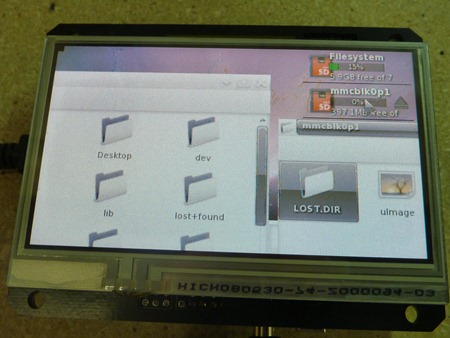
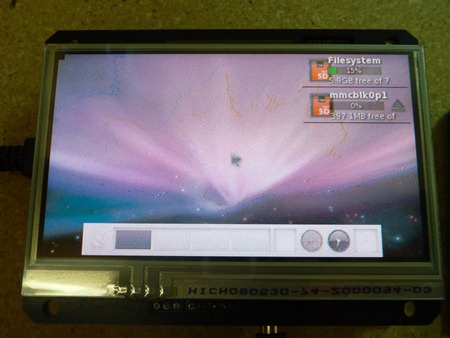
Once booted, the BeagleTouch will show two storage spaces in the upper right corner: the BeagleBoard flash memory, and the SD card.

Open up both, then drag and drop usbserial.ipk and ftdi.ipk to the BeagleBoard flash.
P1010077
Step 4: Install packages on BeagleBoard

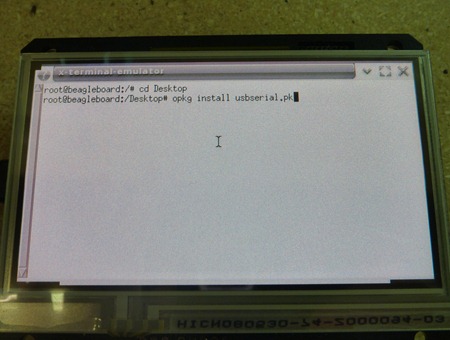
Open up Terminal on the BeagleBoard, and type the following commands:

cd Desktop
opkg install usbserial.ipk
opkg install ftdi.ipk
P1010091 
The BeagleBoard is now capable of talking to the Arduino.

NOTE: I only needed to do this the very first time I connect the Arduino to the BeagleBoard, and I can start at Step 5 the next time I do it.

Step 5: Attach a sensor to the Arduino

Before I plug in my Arduino and sensor to the BeagleBoard, I want to wire it up and pre-program it. I decided to use an accelerometer for this demo, because it’s really easy to see the response.

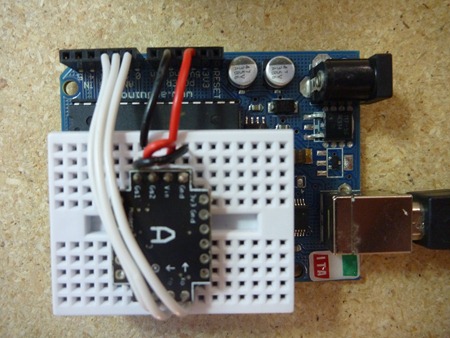
I wired up the accelerometer using the instructions in the accelerometer cheatsheet (PDF). A mini breadboard and some jumper wires comes in handy here.

Accelerometer pins –> Arduino pins
GND -> Ground
Vin -> 5V
Gs1 -> Ground
Gs2 -> 5V
X0 -> Analog 0
Y0 -> Analog 1
Z0 –> Analog 2

P1010092

Step 6: Upload accelerometer code to the Arduino

First, I connected the Arduino + Accelerometer setup to the computer with a standard Type B USB cable.

Switching over to the Antipasto Arduino IDE (IDE install instructions here, if you don’t have it already), I copied and pasted the code into the IDE, then pushed upload.

void setup() {
    Serial.begin(9600);
}

void loop() {
    int valueX = analogRead(0);
    Serial.print("X: ");
    Serial.print(valueX);
    Serial.println(" ");
    int valueY = analogRead(1);
    Serial.print("Y: ");
    Serial.print(valueY);
    Serial.println(" ");
    int valueZ = analogRead(2);
    Serial.print("Z: ");
    Serial.print(valueZ);
    Serial.println(" ");
    Serial.println(" ");
    delay(250);
}
imageNow, the Arduino is ready to be connected to the BeagleBoard.

Step 7 (on BeagleBoard): Start reading sensor information on the BeagleBoard

To do this, I unplugged the Arduino + Accelerometer setup from my computer, and plugged it into the USB hub attached to my BeagleBoard.

Then I went back to Terminal on the BeagleBoard and typed:

cd
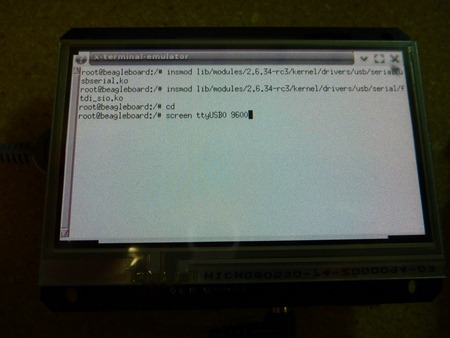
insmod lib/modules/2.6.34-rc3/kernel/drivers/usb/serial/usbserial.ko insmod lib/modules/2.6.34-rc3/kernel/drivers/usb/serial/ftdi_sio.ko

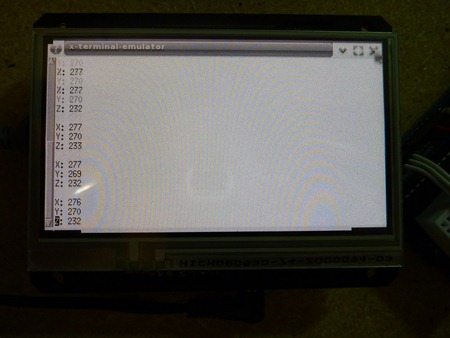
This loads the USB drivers that I installed earlier. To start reading data from the Arduino over serial, I typed the following in Terminal:

cd
screen dev/ttyUSB0 9600

P1010106

And that’s it! The accelerometer is now writing data directly to my BeagleBoard and BeagleTouch.

BeagleTouch Accelerometer
P1010112 Here’s a video of everything in action:

This can also work with a light sensor, compass module, or humidity sensor…or just about any sensor I can run off my Arduino. I wonder if I can do that with my iPad :-)
Monday, June 21, 2010

BeagleTouch and BeagleBoard in Action

A lot of people have emailed me about seeing the BeagleTouch in action, and some of the folks who commented have been curious to see a demo as well. It all starts with plucking the BeagleTouch from the skies…erm, I mean, unpacking it from the box :-)
BeagleTouch in the Sky (Medium)

Beagle Touch Board Juice DIY 
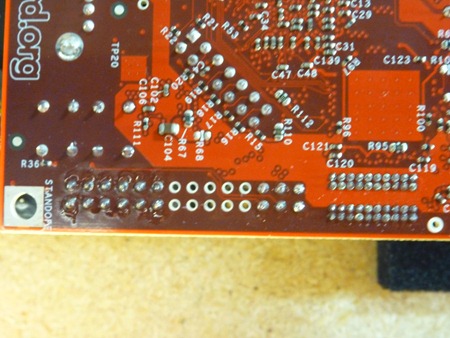
The BeagleTouch mounts directly onto the BeagleBoard with some headers that are included. Justin and I wrote up a brief tutorial on how to solder them up yourself, or you can get the Beagle Embedded Starter Kit with the headers pre-assembled.

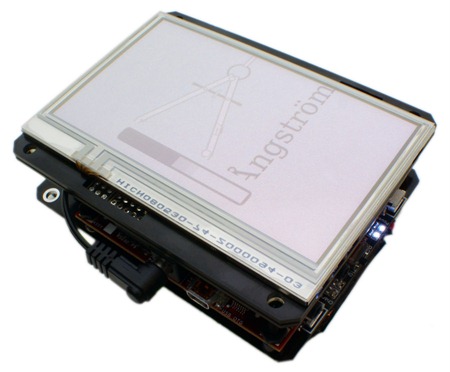
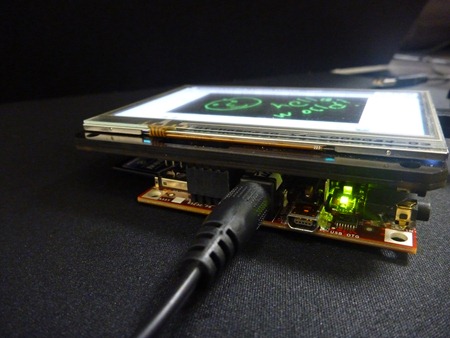
Then it’s simply a matter of placing the BeagleTouch on the BeagleBoard, powering it up, and booting from the pre-formatted SD card (running Liquidware BeagleBoard Linux).SONY DSC SONY DSC Once the BeagleTouch is mounted on the BeagleBoard, simply plug it into a 5V power adapter or a BeagleJuice battery pack to provide power. Since Liquidware BeagleBoard Linux is based on the Angstrom distribution, the boot screen looks like this:

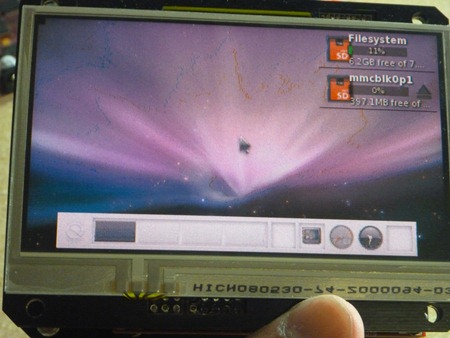
SONY DSCWhen the BeagleBoard is booted up, the BeagleTouch desktop runs a GUI called Enlightenment with the familiar Mac OS X Leopard background:

P1000783 
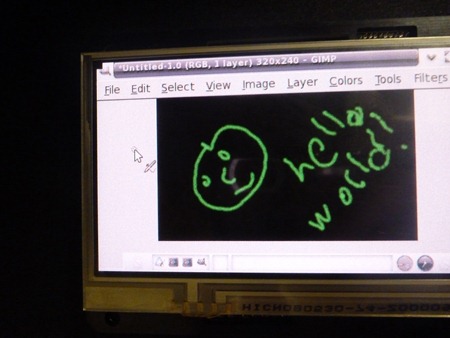
Then I opened up GIMP on the desktop, and started drawing!

P1000593

P1000591

Since the BeagleTouch also brings out the BeagleBoard’s serial connection to a Type B-mini USB port, I’ve plugged that into the terminal on my laptop as well.

P1000592 
And here’s a video of GIMP in action on the Beagle Embedded Starter Kit. (Since it was plugged into the wall, I didn’t need to attach the BeagleJuice in the video):

Saturday, June 19, 2010

A Big Thanks! (and answers to some good questions)

Wow, the last 24 hours have been pretty crazy... I just pulled an all-nighter, and as soon as I post this I’m going to crash and sleep until dinner time… The day all started when I got up in the morning, and there were all kinds of alarms going off because the liquidware website was down. I thought I was getting DDOS'd by the Russians or Chinese or Apple :-) Turns out, a lot of people were visiting the website, which to an undiscerning server looks a lot like a DDOS.

A lot of people have written in over the past 48 hours with questions about the Beagle Embedded Starter Kit, and my Beagle Board projects. First of all, thank you very much! I’m especially grateful to:

-Priya at Wired, who talked to Justin about the motivation for this project
-The guys at Make, and Hackaday, who had a lot of ideas about software to run on the device
-Nuts and Volts posted it on their blog, which is inspirational because I grew up reading that magazine, and taught myself electronics that way

-Gizmodo and LinuxForDevices.com for the summary of open source hardware gadgets

-Engadget for a few a healthy amount of sarcasm and funny comments

I spent the last few hours reading as many blog comments, and replying to emails. I collected some of my favorite ones below - some were nice pats on the back, some pretty funny, and others I thought were really good ideas.

There were a few general points I noticed were common across a lot of the comments, that I wanted to clear up:

-You program it with gcc, built into the Angstrom Linux distribution running on the Beagle Board (I’ll write up some tutorials in the coming days and weeks)

-That means you start it up, then open a shell terminal on the BeagleTouch, and you can use gcc directly from the command line, on the device

-The screen has a great viewing angle, and is surprisingly high res for embedded Linux applications needs. There are higher res screens available, but they tend to get very expensive

-The display drivers are already coded and built into the Angstrom Linux distribution (thanks Chris)

“Wow, this is apple's evil twin, or good twin. I with is had a bigger screen and I wish I knew how to code for it. I would have some fun. But sheesh. Talk about the exact opposite of apple. So anyone know how to code this?”

I certainly don’t pretend to be Apple, but I like the idea of being able to hack and prototype your own devices, hence this project.

“The Beagleboard makes great (cheap) tablet guts, but that screen sucks, and barely qualifies as "tablet". Try doubling the size and resolution, and being capacitive, and then I'm totally sold and will buy one of these in a heartbeat.”

I picked this screen so that it fits well with the size of the BeagleBoard, and that way it looks compact and streamlined. It’s a great size for a mini-tablet, or ebook reader, or screen gauge display for sensors. You can play a decent game of linux solitaire on it too.

“Can we expect Liquidware products to evaporate and become vaporware? … Only when they become really hot. Judging from this one, that's not happening anytime soon.”

That was genuinely funny :-) I hope it’s obvious that to me, the point is the exact opposite, I only talk about stuff if I made from parts you can actually buy, as opposed to vaporware.

“resistive? booo!”

You’d be surprised at how accurate the screen resolution is… check out the video showing me drawing on the BeagleTouch screen with Gimp.

“The target audience for this device is much more technical that most of the people, and editors, here. It's for people with degrees in electrical engineering and computer science. I love my hobby electronics projects.”

I lent one of these to a good friend of mine, who’s Linux programmer, and he got up to speed very quickly. It didn’t take too long to figure out the gcc environment, which many CS programmers know intuitively.

“…and for Only $100 More You could have an iPad with a Larger screen.. and Not need to Build it Yourself. It's all about that man though, man. The Man.”

I’ve always liked building my own stuff. I like to take stuff apart. I dislike gadgets that are locked down, and you can’t get to their internals easily to modify. If I bought a tablet, I’d want to be able to solder out the Flash chip, and solder in a faster or larger one.

“Hmm.. i love the idea of this here... but I don't know if it's been executed properly. For now, I'm just gonna hold out for a 2nd generation iPad, however... I will stay tuned here, because I like where this is going... Thumbs up for innovation.”

Thanks!

“I'd sooner buy this than an iPhone or an iPad. Not quite one to worship at the Altar of Jobs, myself.”

Sounds like a scene from Monty Python!

“For people with degrees in electrical engineering? Hell no lol... I barely have a two year college degree and I would love to get my hands on this and see what I could do by added a different screen and finding the casing. This is for people who are tech minded... Its like playing with advanced legos... Anyone who can build a basic computer can do this so long as they arent afraid of it not looking like a cookie cutter assembly”

I like the reference, thanks! I’ve received a lot of emails from people saying they want to build their own case for it, and use it for industrial design and medical device projects they’re working on. I’ve had a lot of interest from engineers who work at companies, and have been asked to build a working prototype of a new product concept.

“To be fair, the DIY laptop kit isn't meant for computer novices just looking for an easy way to check their email on the couch. It's a modular system designed for serious geeks and developers looking to write specialized applications.”

I personally like to think of myself as a self taught hardware hacker…

“So if you're a tinkerer and are looking for a non-iPad tablet, this might be a nice option.”

I’m using mine for running Linux apps, works pretty nice so far. I’m still trying to port an Ebook application to it.

“The whole setup will set users back by $400. With more polished options available at around—or lower—than that price, LiquidWare's offering might be a hit with Linux enthusiasts, companies looking to develop their own tablet computing platform for internal use, and people who like tweaking gadgets ad nauseam.”

Most of the emails I’ve gotten are from people who like to tweak their gadgets, and hack electronics, so that makes sense.

“It depends what you're into. Some of us would pay extra for the freedom of getting the gadget to work our way, not Apple's way.”

This was one of my favorite comments, because I completely agree. I’d pay extra to buy an iPhone that I could open up and take apart.

“Unlike polished designs such as the Apple iPad or upcoming Samsung Galaxy Tab, the modular Liquidware design is deemed attractive to tech-savvy users who want a highly customizable tablet with additional sensors or other hardware or want to write highly specialized goals. It should handle Android for those that want a more developed OS.”

That’s very flattering.

“It's a novel idea, though the specs on all the diy kits I've found are pretty weak. I'd love to see one come out with some guts to it.”

Some people want pure performance, and are willing to suffer battery life to get it. I’ve noticed that a lot of people, when building their own gadgets, prefer longer battery life and usable life, because they can prototype longer, as opposed to having a higher performance gadget whose battery life dies out quickly.

“Well, for about 400 dollars, you can build your own “iPad killer” from the comfort of your own workshop.”

This was also very flattering, thank you. It’s all about Open Source Hardware, and rapid prototyping. Hopefully this kit will help people with programming and engineering background make their own gadgets much more quickly than it took the engineers at Apple to build the iPad.

“DIY Stands for Do It Yourself, and this new Beagle kit by Liquidware. This DIY tablet is perfect for those who hate being constrained by what manufacturers are throwing at them.”

I like comments and phrases like this that summarize what I think the Open Source Hardware movement is about… it’s about freedom to hack, program, and freedom to change the functionality and build off of what someone else started.

Ok, time to get some sleep… :-)

Tuesday, June 15, 2010

DIY TouchShield Performance Power Gauges

A while back, Mike and Chris built a digital automotive dashboard called the LCDash, which was a DIY project in itself. It was the first real hacker project that helped them learn how to start hacking touchscreens…

So when I was going through my emails this morning, and I got a message from frankenhack about a project by sti_robot to make a set of performance power gauges for his car, I thought it was pretty neat to see the TouchShield Slide come full circle, and end up being a sweet looking, full color digital dashboard:"

http://www.iwsti.com/forums/gd-interior/149303-robotmeter-mkii-its-got-touchscreen-folks.html

I can't believe I didn't see this before... quite cool.

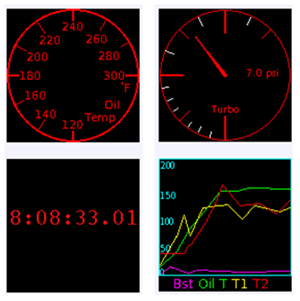
He started out with a bunch of mockups for what he wanted it to look like:imageApparently there was some debate he had about whether he was going to use the Beagle Board or the TouchShield Slide. Funny!

Then, sti_robot made a few all-important inspirational mockups (which look quite "pro" imho):

image
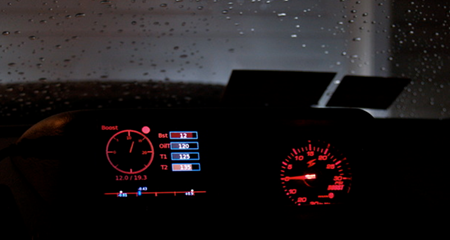
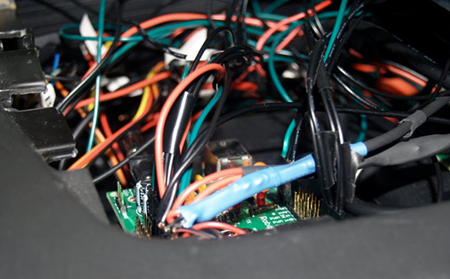
Then, he wired everything into the dashboard:

image
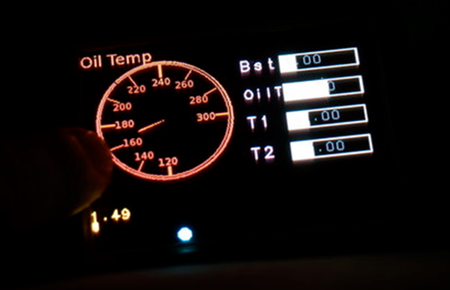
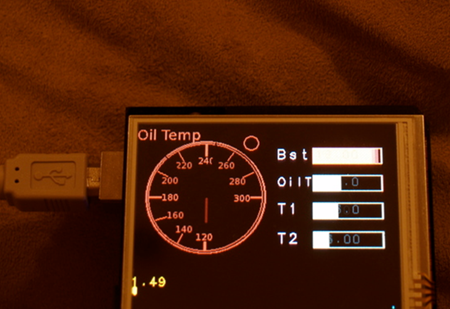
And actually programmed the gauges in processing to run on the TouchShield:

image

image

Here are a couple of videos:

And then... sti_robot had a baby (he's a father now, and doesn't have time)... soooo.... Mr. sti_robot... if you ever see this blog, just email me at inthebitz at gmail. And if you want help, or if you want to send me your code, I'll be happy to help you out. I also noticed on the forum that you wrote about sensor integration. If you want some, you're welcome to whatever sensors you don't already have, just let me know (I bet you could probably make a couple kick ass extensions with a gyro meter to measure pitch / yaw around tight corners). Or maybe you could wire up your baby seat with an accelerometer and measure G-forces at various points on the baby seat, to make sure you're driving nicely :-)

Sunday, June 13, 2010

Three BeagleBoard Accessories

The best things in life come in 3’s.

Red Bull. Espresso. Diet Coke.

Ramen noodles. Triple Threat Powerbars. Dunkin Donuts Breakfast sandwiches - the one with ham and cheese, not the nasty sausage patty thing that reminds me of the last time I threw up every time I bite into one :)

So Justin and I built three modules for the BeagleBoard:

1) BeagleTouch

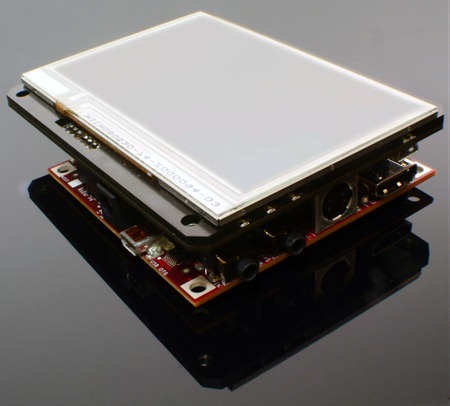
This was an obvious one, ever since Sean wrote me an email almost a year ago, saying, I should build one of these… except that at the time I was building the Illuminato X Machina, so I was a bit pre- occupied. But here it is: a 4.3” touchscreen OLED display that snaps right on to the Beagle Board.

SONY DSC

2) BeagleJuice

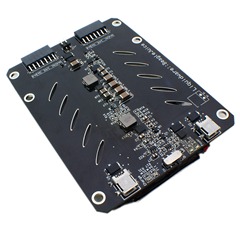
I wish I could take credit for the name, but I owe it to a little girl who came up to me at Maker Faire, and saw my BeagleBoard, and said, “that sounds like a beetle board, like a bug”. Beetle Board -> Beetle -> Power -> Juice -> BeetleJuice -> BeagleJuice! By the name, the BeagleJuice is a battery backpack the powers the BeagleBoard and its peripherals for up to 6 hours.

SONY DSC

3) BeagleMod

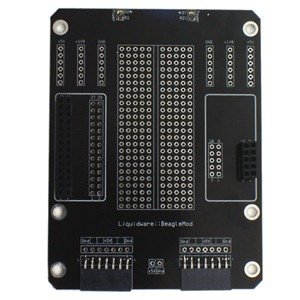
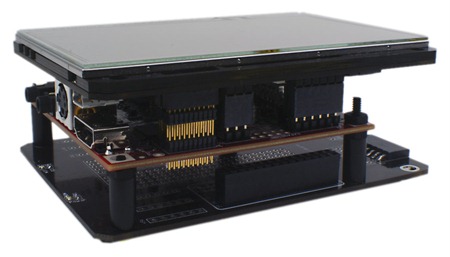
Modders and hackers like Chris and Mike and Justin (and me?) like having stuff to stack and solder random sensors to, so this board does the trick during prototyping. It’s not the fanciest board I’ve ever built, but it stacks nicely under the Beagle Board, and is enough to wire up an accelerometer, temp sensor, or such…

SONY DSC

SONY DSC

Friday, June 11, 2010

How to format an SD card for the BeagleBoard

A few folks asked me about the Liquidware BeagleBoot SD Card, and if there was a tutorial somewhere showing them how to do it with an SD card they had laying around at home.
SONY DSC
So in the spirit of open source, and because it’s Friday, I present my step by step guide to making your own boot SD card for the BeagleBoard
Step 1 – What’s going on here?
First a summary of what’s about the happen. The gist of the steps that follow are this: you start with an SD card… and then you’re going to download Liquidware Beagle Angstrom Linux, format the SD card in a specific way that helps the BeagleBoard know where to find the boot image, untar the rootfs, and untar the kernel into separate partitions on the SD card.
It’s actually pretty simple once there’s a roadmap :)
Step 2 – Download the Liquidware Beagle Angstrom Linux rootfs and kernel tar images


Kernel tar - http://www.liquidware.com/code/kernel-vfat.tar.bz2
Rootfs tar - http://www.liquidware.com/code/rootfs-ext2.tar.bz2


Step 3 – Format the SD card
Run fdisk on the SD card
Delete everything off the SD card
Key in the following commands:
x
h
255
s
63
c

Take the number you got from x above, and divide it by 255 / 63 / 512. For instance:
7950303232 / 255 / 63 / 512 = 966.569, rounded down is 966
Key in that number, for instance:
966
Then do this:
r
n
p
1
1
n
p
1
+50
t
1
c
a
1
n
p
2
enter
enter

w
Then do the hokey pokey, turn yourself around, quit fdisk, and issue the commands on the command line:
sync
sync
Run fdisk on the SD card you just formatted, and then make the vfat file system with this command:
sudo mkfs.vfat /dev/vfat
On my computer, this was the command I ran:
sudo mkfs.vfat /dev/mmcblk0p1
Then eject the SD card, reinsert it, and repeat for the ext3 partition.
sudo mkfs -t ext3 /dev/ext3
On my computer, this was the command I ran:
sudo mkfs -t ext3 /dev/mmcblk0p2
Then unmount the SD card, and eject and reinsert it.
cd into the vfat partition (for me, it was /media/vfat) and run this command:
sudo tar -xvf /home/root/kernel-vfat.tar
sync
sync

Then unmount the vfat partition, and run these commands:
sync
sync

Eject the SD card, and then reinsert it. More hokey pokey. Then continue.
mount ext
sudo tar -xvf /home/root /rootfs-ext.tar
sync
sync
Then unmount the ext3 partition, and run these commands:
sync
sync

Eject the SD card. Pop it into the BeagleBoard, and it should boot up Liquidware BeagleBoard Angstrom Linux :-)
Angstrom BeagleTouch
And I’ve put the BeagleBoard, pre-formatted Beagle Boot SD card, and the BeagleTouch up over at the Liquidware shop.

Wednesday, June 9, 2010

Up and running on the BeagleTouch


Step 1 - Get your BeagleBoard

This is the first and most obvious step – just take out the BeagleBoard, and place it on the table, prepared for a brief cosmetic surgical procedure (no, nothing like Heidi from the Hills, much simpler and less obvious!)

P1000800 
Step 2 - Unpack everything from the box and organize it

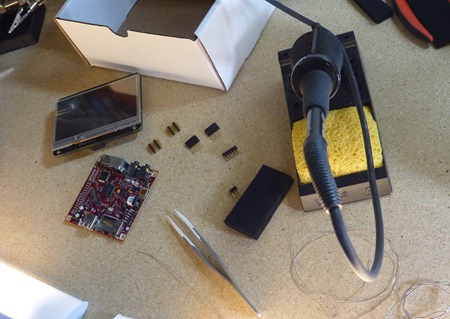
There are 4 individual headers that need to get soldered onto the BeagleBoard. Why? Because the BeagleTouch requires a lot of IO pins to transmit all the high speed data to and from the BeagleBoard. Essentially, the BeagleTouch becomes a handheld, symbiotic, integral screen element, a lot like when in Avatar when the Na’vi form a symbiotic interdependence with the other creatures of… nevermind.

P1000610

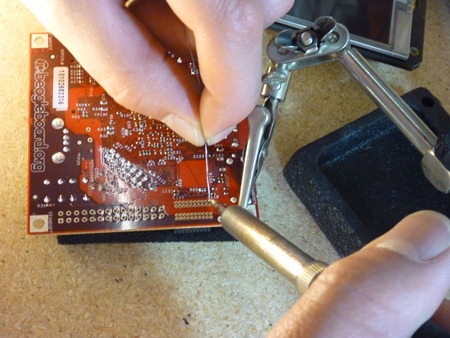
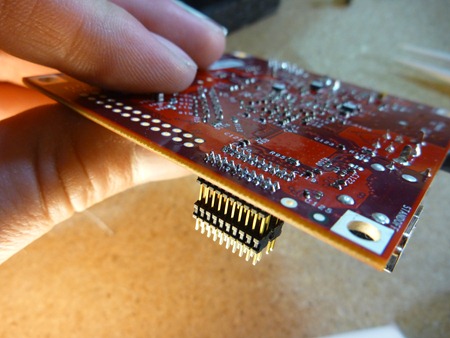
Step 3 - Place the little headers in J4 and J5 and solder them in

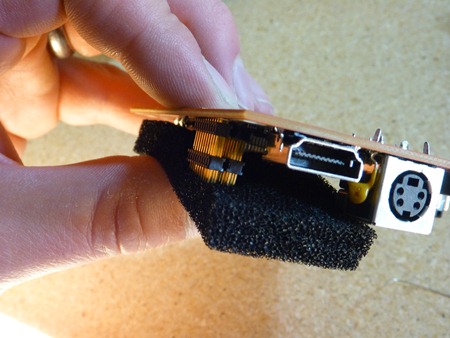
To do this, I used a piece of black anti-static foam to secure the two mini-headers relative to the big RS-232 header. It stayed in place well, and I made sure that that the headers were aligned parallel so that they could snap into the appropriate sockets on the BeagleTouch. This is the hardest part of the process, because you have to make sure the headers are parallel.

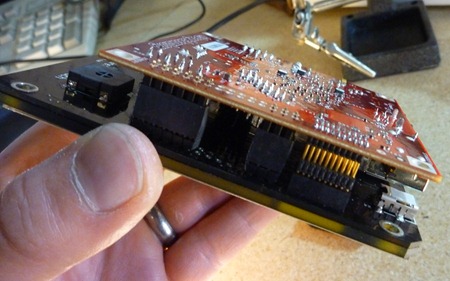
EDIT: Actually, it’s just as easy to simply follow Step 4, and place the headers into the BeagleBoard, and then snap the BeagleTouch onto the loose headers, then flip the whole thing on its back, and solder them up. Thanks Jim.

 P1000615

P1000617

P1000622 P1000632

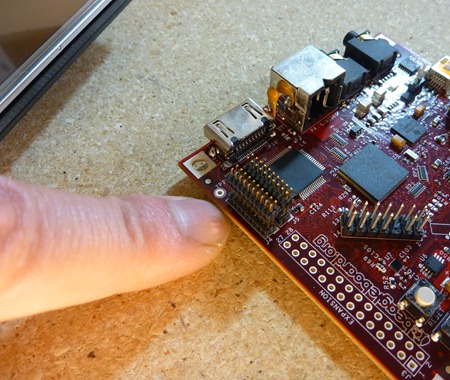
Step 4 - Place the two other headers, and mount the BeagleTouch

Once the little guys are in, the bigger headers are easy - I used the BeagleTouch itself as a jig to hold the headers in place.
P1000633
   
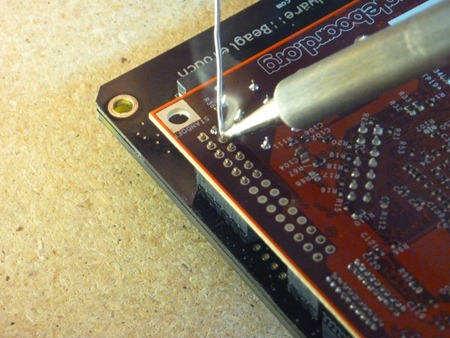
Step 5 - Solder the large headers onto the Beagle Board

By now, if you’ve figured out how to solder in the tiny ones, these are a cinch. The reason I did these second, is because I knew that the little ones would require more focus, and I have really bad ADD and if I had done it the other way around, I probably would have lost patience and gotten sloppy toward the end. At least this way, if I got sloppy toward the end, it was with the big honking headers that take more solder…

P1000642

Afterward, just do a quick visual inspection to make sure that each pin stands alone, and that there isn’t any solder bridging over two pins.

P1000651

Optional: Step 6 - Insert 1 single header to the remaining IO connector, bend them, and solder them

If you want to do physical computing with the BeagleBoard, you probably want to make the general purpose connector IO easy to get to when the BeagleTouch is stacked on top. Sooooo… Justin gave me a 1x5 female header (which is in the kit), so I could solder it in, then bend it out to the side. The result is a nifty little way to get access to digital IO on the BeagleBoard… although of course this step isn’t absolutely necessary just to get the BeagleTouch up and running.

Step 7 - Mount the BeagleTouch, insert SD card, and power it on

Then I inserted in the Liquidware BeagleBoard Linux boot SD card, and plugged it in using a 5V wall adapter.

BeagleTouch Liquidware Linux on

Step 8 – If you’re lazy….

If you don’t want to do any of the steps above, for an extra $20, I’ll solder everything for you, and make sure it works. I don’t know, some people really like doing it themselves, other people (e.g. guys with more programming background), don’t want to do it, and aren’t as confident with a soldering iron, and so they would prefer to pay someone else to do it.

On the Liquidware shop, I’ve added an option to the page for me to solder the headers for you…

BeagleBoard C4 - with pre-assembled header option

Beagle Embedded Starter Kit

Beagle Ultimate Gadget Pack

Introducing the BeagleTouch

The BeagleTouch is a modular display for the BeagleBoard. It’s inspired by concepts of modularity and rapid proto-typing, and continues Liquidware’s expansion into higher performance open source hardware.
Matt and I lined up one of almost every major modular gadget platform that he, Chris, Mike, and I have made over the past 2 years in one spot on the table. We called it “The evolution of Liquidware’s modular gadgets” and in tribute, found an old copy of Stephen Hawking’s A Brief History of Time.
P1000679
P1000676 
First there was the Arduino and the TouchShield Stealth. This combination let anyone with an Atmel 168-powered Arduino Diecimila make small, handheld, portable, self-contained gadgets.
Stealth 
Then came the TouchShield Slide, for programmers with more demanding applications who wanted larger screen real estate, and a more accurate touchscreen to pair with the more powerful Arduino Duemilanove. The TouchShield Slide was featured on TV in NYC, used by celebrities, hacked by NASA, used for industrial design, and for rapid prototyping by the Department of Defense (no joke, they’re probably reading this right now and shaking their heads tsk tsk). The TouchShield Slide let the Arduino run Mario, and it has its own open source operating system, Pyxis, and a lightweight port of a small MacOS by Mark.
Slide 
Then there was what Eric von Hippel would call “architectural innovation”, which is where the same modules are used over and over, but the architecture and the substrate changes and morphs as the modules are reconfigured into new setups.
This is the Arduino Gameboy Gamepack with an Arduino Duemilanove, Lithium Backpack, Doublewide Extendershield, Touchshield Slide, and Inputshield.
Arduino GameBoy 
Here’s a picture of the Arduino Mega and the Mega Backpack with a TouchShield Slide:
Portable MegaPalm
Then there was the TripleWide Extender, which I used for the open source calculator project:
 TripleWide Gadget 
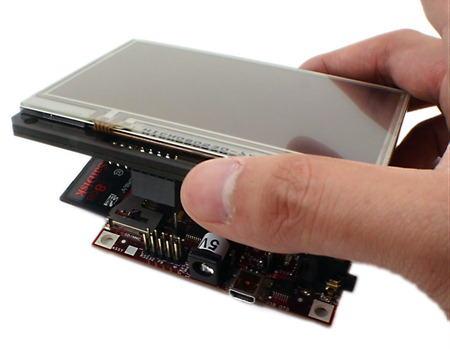
And now… hot on the tails of Apple’s announcement of the newest iPhone v4, Justin, Chris, Mike, Paul, and I present the new Open Source Hardware, modular BeagleTouch:
SONY DSC
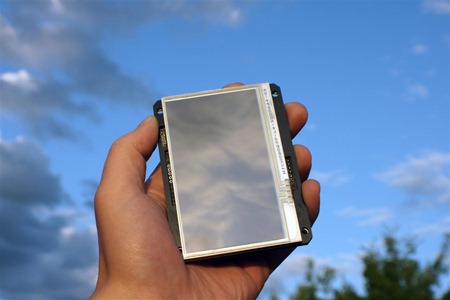
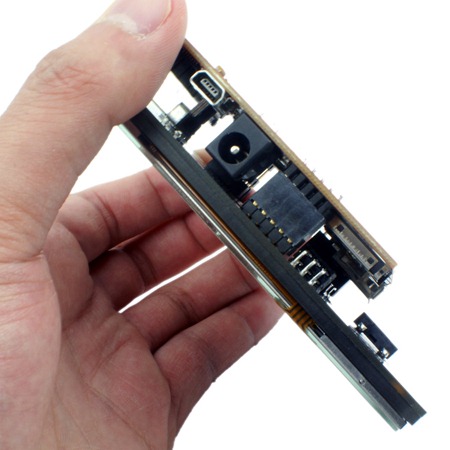
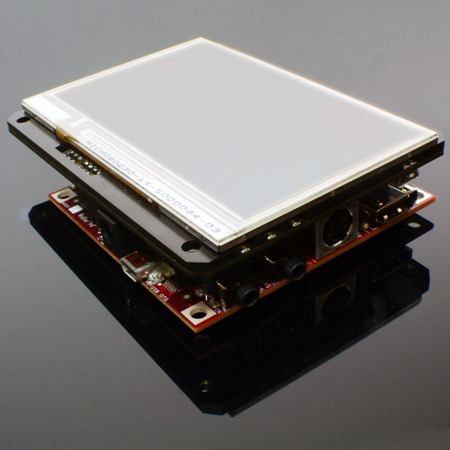
The BeagleTouch is a open source hardware modular screen, which snaps onto the BeagleBoard, and lets someone build and prototype handheld Linux gadgets.